New-NAVWebServerInstance – The data is invalid (0x8007000D)

When trying to install a new web client instance of Business Central 19.1 on Windows Server 2022 I ran into this error:

Set-WebConfigurationProperty : The data is invalid. (Exception from HRESULT: 0x8007000D)
At C:\Program Files\Microsoft Dynamics 365 Business Central\xxxxxx\Service\NAVWebClientManagement.psm1:654 char:5

  • Set-WebConfigurationProperty -Filter ‘/system.webServer/security/ …
  • ~~~~~~~~~~~~~
    • CategoryInfo : NotSpecified: (:) [Set-WebConfigurationProperty], COMException
    • FullyQualifiedErrorId : System.Runtime.InteropServices.COMException,Microsoft.IIs.PowerShell.Provider.SetConfigurationPropertyCommand

Set-WebConfigurationProperty : The data is invalid. (Exception from HRESULT: 0x8007000D)
At C:\Program Files\Microsoft Dynamics 365 Business Central\xxxxxx\Service\NAVWebClientManagement.psm1:655 char:5

  • Set-WebConfigurationProperty -Filter ‘/system.webServer/security/ …
  • ~~~~~~~~~~~~~
    • CategoryInfo : NotSpecified: (:) [Set-WebConfigurationProperty], COMException
    • FullyQualifiedErrorId : System.Runtime.InteropServices.COMException,Microsoft.IIs.PowerShell.Provider.SetConfigurationPropertyCommand

The error was solved by downloading and installing the latest version of .Net Runtime from https://dotnet.microsoft.com/download/dotnet/5.0/runtime (Choose “Download Hosting Bundle”). In my case the latest version was 5.0.11. After installing this version the problem was gone.

Setting Windows time zone with Powershell

I was having some trouble changing the time zone from the control panel in Windows Server 2019, got this error ‘You do not have permission to perform this task…’. So I thougt I would just do it from Powershell instead.

Run an elevated Powershell (run as administrator) and use this command:

Get-TimeZone -ListAvailable | Out-GridView -PassThru | Set-TimeZone

This will show you a list of the available time zones and change the time zone to the one you choose.

Import-NAVData into an empty database

I have been struggling with this a few times, and I was sure that I succeeded earlier when trying to import a .navdata file into an empty SQL database, so this time I’m going to write a short post about it.

Looks like it is really quite simple.

If you have a .navdata file that contains application, application data, global data and some company data as well, then you can import this with PowerShell directly into an empty SQL Server database.

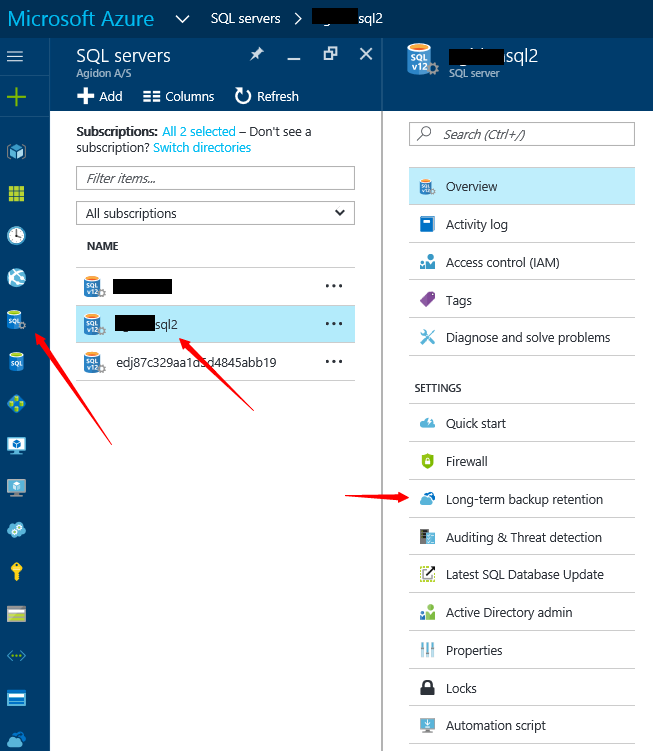
First you need to create the empty database and you can do this from Microsoft SQL Server Management Studio or the Azure Portal if you are on Azure SQL.

Then open up PowerShell and import your NAV-modules. I use the Import-NAVModules cmdlet from Cloud.Ready.Software.NAV, but you can also use…

Import-module “C:\Program Files (x86)\Microsoft Dynamics NAV\11.0.20783\Service\Microsoft.Dynamics.Nav.Management.dll”

Then run Import-NAVData…

Import-NAVData -DatabaseServer <SQL server name> -DatabaseName <Database name> -ApplicationDatabaseServer <SQL server name> -ApplicationDatabaseName <Database name> -FilePath “C:\temp\backup.navdata” -IncludeApplication -IncludeApplicationData -IncludeGlobalData -AllCompanies -CommitPerTable -Force

Note this example is a single tenant database. If you are using SQL server instances you can type mysqlserver\myinstance under -DatabaseServer and -AppliationDatabaseServer.

Does it work on Azure SQL? Yes it does…

Import-NAVData -DatabaseServer $azuresql -DatabaseName $azuresqldb -DatabaseCredentials $azuresqlcred -ApplicationDatabaseServer $azuresql -ApplicationDatabaseName $azuresqldb -ApplicationDatabaseCredentials $azuresqlcred -FilePath “C:\temp\backup.navdata” -IncludeApplication -IncludeApplicationData -IncludeGlobalData -AllCompanies -CommitPerTable -Force

If you omit the -Force parameter you will get this…

Import-NAVData : System table $ndo$dbproperty is missing or database MyDatabase is not a Dynamics NAV application database
.
At line:1 char:1
+ Import-NAVData -DatabaseServer $azuresql -DatabaseName $azuresqldb -D …
+ ~~~~~~~~~~~~~~~~~~~~~~~~~~~~~~~~~~~~~~~~~~~~~~~~~~~~~~~~~~~~~~~~~~~~~
+ CategoryInfo : NotSpecified: (0:Int32) [Import-NAVData], NavSqlException
+ FullyQualifiedErrorId : agidonsql2.database.windows.net\nhtest2,Microsoft.Dynamics.Nav.Management.Cmdlets.Import
NavData

EDIT: I noticed that the actual company data was not imported with the above commands, not sure why. But if you experience the same you can always run the commands again without the -IncludeApplication, -IncludeApplicationData and -IncludeGlobalData parameters.

Also I got this message on Azure, when the Import-NAVData command finished…

Import-NAVData : Error while trying to set the collation for database nhtest2 containing tenant default. The error was:
The following SQL error was unexpected:
The database could not be exclusively locked to perform the operation.
ALTER DATABASE failed. The default collation of database ‘nhtest2’ cannot be set to Danish_Greenlandic_100_CS_AS.

I tried deleting the database and recreating it from the Azure Portal specifying ‘Danish_Greenlandic_100_CS_AS’ as collation. After that I was able to restore everything to the Azure SQL database.


RDP – An internal error has occured

I’m using a Let’s Encrypt SSL certificate with Remote Desktop Services and have set up a script to automatically renew the certificate and also update the certificate for the Remote Desktop Services.

The script renews the certificate just fine but after the has been rebooted I can no longer connect via RDP and I get the error ‘An internal error has occured’. Not very informative. The server is a Azure VM and I tried every suggestion I could find including restarting, redeploying and resetting the password. The boot diagnostics wouldn’t even update the screenshot.

I bet there are more ways to solve this, but here’s what works for me.

On another server in the same domain, start the Server Manager. Click on ‘Add other servers to manage’ and select the troubled server and add it. Wait while the servers roles are being fetched. The ‘Remote Desktop Services’ role should appear on the list to the left. Click on it and on the ‘DEPLOYMENT OVERVIEW’ under ‘TASKS’ select ‘Edit Deployment Properties’.

Now select Certificates, select ‘RD Connection Broker – Enable Single Sign On’ and click the ‘Select existing certificate…’ button.

2018-05-15_11h18_44

Enter the password for the certificate (or choose a different certificate) and mark ‘Allow the certificate to be added to the Trusted Root…’. Click OK.

That’s what I had to do to fix my problem, hope this will save someone else some time. Now I just have to figure out what I have to do to prevent it from happening every time the certificate is renewed.

How to restore Microsoft SQL database from Azure blob (with special characters in logical name)

I was struggling with this and now I found a solution I would like to share 🙂

I have setup Managed Backup on a SQL server and now I have a lot of backupfiles located in a storage account on Azure. I needed to figure out how to use these files for database restore. First I tried simply using SQL Server Management Studio, but I didn’t get very far. I can select the blob storage, but for some reason it does not show any files?

Next option was restoring using a query.

I wanted to restore the database to a new server and I want the database files to be located in another folder. To do that I need to know the logical names of all files in the database backup, you can get that by using this query…

RESTORE FILELISTONLY

FROM URL = 'https://mybackupstorage.blob.core.windows.net/mybackupcontainer/MyDatabase 2015_726ef093fa6d4165b0492221922832bb_20170614141530+02.bak'


SQLrestore1
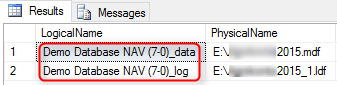
The result of this query lists the logical name of alle database files, and the physical location of the files on the server where the backup was taken.

Notice that the above logical names contains parentheses. I could not find a way to escape these, so instead I used variables.

DECLARE @fn1 VARCHAR(50)

DECLARE @fn2 VARCHAR(50)

SET @fn1 = 'Demo Database NAV (7-0)_data'

SET @fn2 = 'Demo Database NAV (7-0)_log'

RESTORE DATABASE [My database 2015]

FROM URL = 'https://mybackupstorage.blob.core.windows.net/mybackupcontainer/Mydatabase 2015_726ef093fa6d4165b0492221922832bb_20170614141530+02.bak'

WITH

MOVE @fn1 TO 'C:\SQL data\Mydatabase2015_Data.mdf'

,MOVE @fn2 TO 'C:\SQL data\Mydatabase2015_Log.ldf'


The result should hopefully be something like this…

SQLrestore2

Azure SQL Long-term backup retention

Azure SQL Long-term retention just want into public preview. I was looking for a guide to set this up, but I couldn’t find anything, so here is my own little guide 🙂

  • Log into your Azure portal (https://portal.azure.com)
  • Click on azure_sql_ltr_ss3 and search for ‘backup’. Click the result ‘Backup and Site Recovery (OMS)’ to create a new Recovery Services Vault.

azure_sql_ltr_ss5

  • Fill out the form. Select the subscription that also contains your SQL server
  • Select the Resource group that your SQL server is also a member of
  • Select your preferred Location
  • Click Create
  • Wait a few seconds while your Recovery Services vault is being created
  • Go into SQL Servers
  • Click on your SQL server
  • Click on the new setting called “Long-term backup retention”

azure_sql_ltr_ss1

  • If you have not yet accepted the preview terms you will see this message:

azure_sql_ltr_ss2

  • Click the message, click the checkbox that shows up, and click the OK button
  • Select the databases you would like to backup
  • Click the Configure button on top of the pane
  • Select your Recovery service vault
  • Create a new retention policy by filling out the name and choosing the retention period
  • Click OK

azure_sql_ltr_ss6

  • Click the Save button on top of the pane

azure_sql_ltr_ss7

  • That should be it 🙂

Windows Server 2012 R2 loosing network connectivity

Just a short post before I forget this myself. I have been struggling with two Hyper-V host servers loosing network connectivity every now and then. I have 3 servers in totalt, one of them never had this problem. The server simply stops communicating on all network interfaces at the same time. It’s still connected, but I can’t ping the default gateway. I have been through every setting multiple times, but finally I found this one setting on the network card properties that was different from the server that was working. Under the network card properties choose Configure… and then click the Advanced tab. Find the Virtual Machine Queues property and set it to disabled. Haven’t had any problems after this change. As you can see from the screenshot we’re running Broadcom NetXtreme Gigabit Ethernet network interface cards and the servers are Dell PowerEdge R620, don’t know if it matters? Also tried updating drivers and firmware a couple of times, but without any luck.

VMQ

ClickOnce – Automatically update version

I often have to update Dynamics NAV ClickOnce applications and I got tired of updating the version in the two manifest files, that is why I updated my batch file to do it for me.

I keep my ClickOnce application files in c:\inetpub\wwwroot\xxx. When I need to make changes I edit or add files to that folder. When any change are made to the ClickOnce application files you need to update the manifest files using mage.exe. To do that I use this batch file (run as administrator)

SET /p VERSION=<c:\clickonce\NAV2016Demo.version.txt
SET /A VERSION=%VERSION%+1
>c:\clickonce\NAV2016Demo.version.txt ECHO %VERSION%
SET VERSION=9.0.0.%VERSION%
ECHO %VERSION%
CD C:\inetpub\wwwroot\ClickOnce\NAV2016demo\Deployment\ApplicationFiles
DEL /Q web.config
c:\clickonce\mage.exe -update Microsoft.Dynamics.Nav.Client.exe.manifest -FromDirectory . -version %VERSION%
CD C:\inetpub\wwwroot\ClickOnce\NAV2016demo\Deployment
c:\clickonce\mage.exe -update Microsoft.Dynamics.Nav.Client.application -appmanifest ApplicationFiles\Microsoft.Dynamics.Nav.Client.exe.manifest -appcodebase https://2016install01.domain.dk/NAV2016demo/Deployment/ApplicationFiles/Microsoft.Dynamics.Nav.Client.exe.manifest -version %VERSION% -minVersion %VERSION%
COPY c:\clickonce\web.config C:\inetpub\wwwroot\ClickOnce\NAV2016demo\Deployment\ApplicationFiles\
PAUSE

This will update the manifest files and increment the version and minimum required version by 1.

Please note that the current version is read from the file C:\ClickOnce\NAV2016Demo.version.txt file and not directly from the manifest files (too complicated for me ;-))

Also note that the version will be set to 9.0.0.x where x is the number that is incremented. You can of course modify this any way you like.

Adding BGInfo extension on Azure Resource Manager VM

Microsoft has not yet added a way to add extensions to Resource Manger VMs on Azure. Luckily there is a way to do this using Powershell.

Prerequisites:

You need to have the Azure Powershell tools installed – see https://azure.microsoft.com/da-dk/documentation/articles/powershell-install-configure/

Afterwards connect to Azure – see this http://azurefabric.com/powershell-1-0-and-arm-tenants-and-subscriptions/

First step:

First we need to install the Windows Azure VM Agent on the VM server. This can be downloaded from here – http://aka.ms/vmagentwin.

You need to run this installer from an elevated command prompt (run command prompt or Powershell as administrator).

If you skip this step you will be in all kinds of trouble 😉 I didn’t install this before I installed the BGInfo extensions. The extension was installed, but the status was failed. Also the standard extension (if you installed diagnostics) Microsoft.Insights.VMDiagnosticsSettings failed after this. Installing the Azure VM Agent afterwards does not solve these problems. I’m currently trying to uninstall the BGInfo extension again from the portal, it has been running for 54 minutes now… I will update this post later, when I have a solution for this mess.

Second step:

Start up your Azure Powershell and connect to your subscription (see prerequisites)

Run this command to install the BGInfo extension (thank you BigSkyTech – Technet forums post)

Warning! Users will get disconnected while the VM is being updated!

Set-AzureRmVMExtension -ExtensionName BGInfo -Publisher Microsoft.Compute -Version 2.1 -ExtensionType BGInfo -Location northeurope -ResourceGroupName YOUR_RESOURCE_GROUP -VMName YOUR_VM_NAME

Next time you log in to your server, the BGInfo should now be displayed, yay!

The extension also becomes visible in the Azure management portal – look under Virtual Machines > YOUR_VM > Settings > Extensions

Want more?

Wanna see all available extensions? Run this…

Get-AzureVMAvailableExtension | Out-GridView

If you want to install Microsoft Antimalware you can run…
Don’t use this just yet… it’s kinda buggy 😦
Set-AzureRmVMExtension -ExtensionName IaaSAntimalware -Publisher Microsoft.Azure.Security -Version 1.3 -ExtensionType IaaSAntimalware -Location northeurope -ResourceGroupName YOUR_RESOURCE_GROUP -VMName YOUR_VM_NAME
Be patient, it can take quite a while to add certain extensions, don’t give up! 🙂


sessionState mode=”InProc”

Just wanted to share a silly mistake that I made when testing NAV 2016 web client (could have been any version).

NAV 2016 webservice error

Problem:

When trying to access the webclient I got the above error (<sessionState mode=”InProc”/>).

Solution:

I forgot to add the port number in the url. The webclient runs on port 8080 (default), but I didn’t specify this when typing in the url. I was trying to access https://nav2016.yourdomain.com/INSTANCE_NAME/WebClient/ instead of https://nav2016.yourdomain.com:8080/INSTANCE_NAME/WebClient/.

The reason this has given me such a headache is that the url https://nav2016.yourdomain.com/INSTANCE_NAME/WebClient/ does exist, but the web client is configured for port 8080 which is why I am getting the above error.

I hope this will help someone else save some time 🙂